Today we have many good pictures - the windows arrived and final plastering has begun! In the morning the scaffolding inside was erected again, but we found the clay plaster to bee too wet to be able to put on another layer... so a heater is drying the top of the dome for most of the day and night.
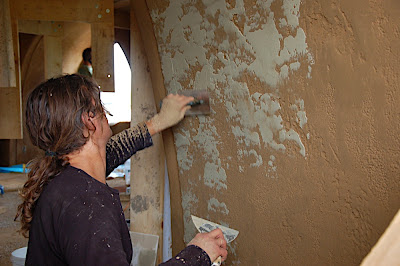
Eduardas from Lithuania started to make a final plaster in one vault. Here is the preliminary result after 3 layers of different color, all done in about 3 hours time:
If you wonder how he achieved the structure, here are the steps. After applying the plaster about 3-4mm thick, he took a rough roller for the surface structure:
Then he was punching holes and scratching the plaster by hand:
This was then partially smoothened:
On top of all this he applied a coat of
Picas ART clay with a green tint, just slightly touching the surface.
This is the resulting structure:
Then another layer of white
Picas ART clay was applied, leaving some of the green clay visible:
He said this is just the beginning, more will follow... but tomorrow it will be time for the Dome. Pavol and Christo did some preparations for tomorrow as well, putting on a red plaster with bits of Mother of Pearl. Looking forward to see the result tomorrow.
The windows arrived in the morning, but in the end we choose not to install them except for one example. There is so much to dry inside, without cross ventilation it would not work...
The Windows were delivered by
Makrowin, they specialize on passive house windows, but in this particular case helped us to get frameless triple glazing. Just glass without frames are a good solution, but there are a few drawbacks - exchanging the window pane if it breaks is really hard and needs the removal of the inside plastering... and the windows can not be opened. Both is OK for us, we have a ventilation system and if we need new plaster inside it will be just an invitation to do some new exciting textures...
The windows were put in the opening and are resting on 2 plastic distance holders.
Below the glass we drilled one small hole in each side of the octogonal. This is for a minimal ventilation, in winter there is always a risk of condensation and this might help.
I later explained the group what is important in windows, everything from the spacers to U value and air tightness.
Inside we are sealing the glass with a vapor and air tight tight tape, of course after having cleaned the OSB boards:
Outside we are using a very different tape which is vapor open but wind tight. Both are from
Isocell.
The windows are fixed at the top and bottom. We plan to replace these with a frame of xps on the outside and wood fibre boards on the inside:
The outside XPS elements were cut by a hot wire cutter to the exact shape:
Tomorrow more about how we did the inside wood fibre boards and later also more about how we plan to glue the window sill to the glass!
Here are some pictures of technological advances as well, a mixing method much faster (and pleasant) than by hand:
and scratching the curved surface of the clay before the next layer is applied:
We are also using XPS from
Isover to insulate the weekest areas of the skylight... this is later going to be cut and modeled to a smoother shape.
Now it is raining again - hopefully nothing gets too wet... probably only the bottom parts of the building. The measurements of realtive humidity are showing very high levels just below the outside plaster (95% RH) but luckily only 85% RH in the middle of the bales. Hope the humidity levels are about to drop now, everything seems to become more dry, inside and outside...